The control module on the Nureva Wall WM408i must be updated manually. To update the control module, follow the steps below:
- Unzip the updater package, as directed by support. The package contains a firmware update .hex file and a Microchip™ PIC32UBL bootloader application.
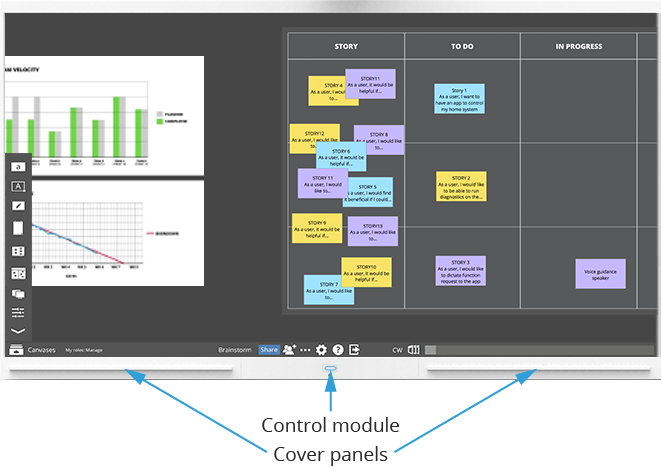
- Remove the bottom front panels from the Nureva Wall touch panel from the left and right side of the control module
- Disconnect the 5VDC power connector (left side) and USB-B cable (right side) from the control module
- While holding the power button down, re-connect the USB-B port. This cable should be connected to the computer driving the Nureva Wall. When power button LED changes to a blinking blue, release the power button.
- Launch the PIC32UBL application
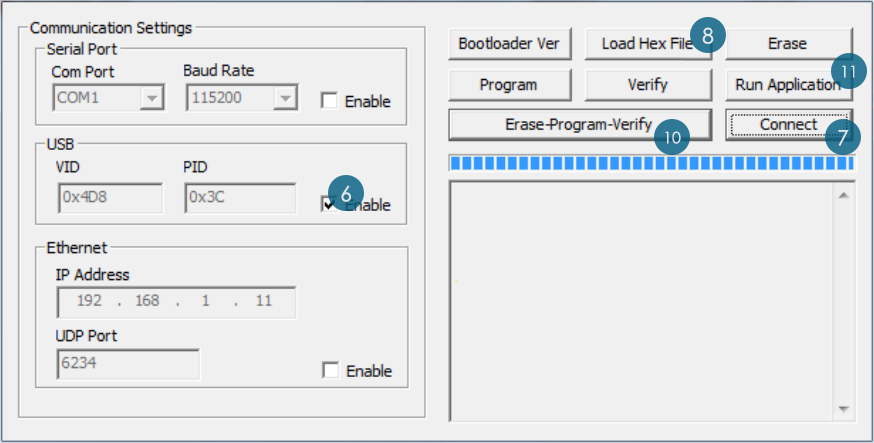
- Click the USB checkbox to "Enable"
- Click Connect. A message should appear saying the connection was successful.
- Click Load Hex File.
- Browse to and select the firmware .hex file that was unzipped in step 1
- Choose Erase-Program-Verify
- Click Run Application. A success message should appear.
- Click Disconnect
- Exit the PIC32UBL.exe application
- Disconnect the USB-B cable once more
- Re-connect all cables
- Restart the PC
If you're using a dual or triple Nureva Wall system, repeat the steps above for all touch panels.